How to Build Steps?
Building steps is more than just a functional project; it’s an opportunity to enhance your home’s safety, style, and overall curb appeal. Whether you’re creating a welcoming entrance for your porch, a sturdy pathway through your garden, or durable stairs for a deck or patio, the right design and materials can make all the difference.
By learning how to build steps with wood, concrete, or stone, homeowners can combine durability with aesthetics, ensuring their outdoor spaces remain both practical and beautiful. With careful planning, proper measurements, and the right building techniques, even a DIY enthusiast can create steps that stand firm for years while perfectly complementing their home’s design.
Key Details for Building Durable and Stylish Steps
| Aspect | Details |
|---|---|
| Purpose of Steps | Provide safe access, enhance style, and improve functionality |
| Common Locations | Home entrances, decks, porches, garden pathways, outdoor living areas |
| Key Materials | Wood, Concrete, Stone |
| Wood Benefits | Easy to work with, classic look, affordable |
| Wood Drawbacks | Requires regular sealing, less durable than stone or concrete |
| Concrete Benefits | Strong, long-lasting, customizable finishes |
| Concrete Drawbacks | Needs formwork, can crack if not cured properly |
| Stone Benefits | Natural look, highly durable, blends with landscapes |
| Stone Drawbacks | Heavy, requires professional skill to install |
| Essential Tools | Tape measure, saw, hammer, drill, shovel, mixer, chisel |
| Safety Gear | Gloves, goggles, dust mask, sturdy footwear |
| Step Dimensions | Riser: 6–7.5 in, Tread: 10–12 in, Width: 36+ in |
| Wooden Steps Process | Cut stringers, attach risers/treads, seal wood |
| Concrete Steps Process | Excavate, build formwork, pour concrete, cure |
| Stone Steps Process | Lay gravel base, place stones, level, secure with mortar |
| Safety Tips | Add non-slip surfaces, proper lighting, handrails |
| Drainage Importance | Prevents erosion, keeps steps stable |
| Style Enhancements | Paint/stain wood, stain concrete, mix stone textures |
| Maintenance for Wood | Seal or paint every 2–3 years |
| Maintenance for Concrete | Seal cracks promptly, reseal surfaces |
| Maintenance for Stone | Refill joints, clean weeds, maintain base |
| Permit Requirement | Often required by local building codes |
| DIY Suitability | Wood: easy; Concrete: moderate; Stone: advanced |
| Durability Ranking | Stone (highest), Concrete (very high), Wood (moderate) |
| Cost Factor | Wood (least expensive), Concrete (moderate), Stone (most expensive) |
How to build Steps?
Before starting any project, careful planning is essential. Begin by identifying the purpose of the steps, whether they’re meant for a front entrance, backyard deck, or a decorative garden pathway. Each location comes with different requirements for safety, aesthetics, and durability.
Consider the local building codes and regulations, as these often dictate the minimum step height (riser), step depth (tread), and safety features such as railings. Taking accurate measurements of the height and width of the area ensures that the steps will fit perfectly and provide comfortable use.
Choosing the Right Materials: Wood, Concrete, or Stone
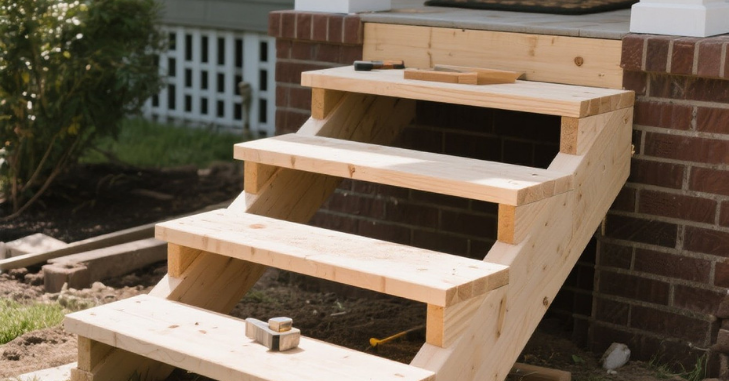
Wood Steps
Wood is a classic and versatile choice, especially for decks and porches. Pressure-treated lumber and hardwoods, such as cedar or redwood, resist rot and insects, making them suitable for outdoor use. Wood steps are easier to cut and assemble with standard tools, making them a favorite for DIY enthusiasts.
Concrete Steps
Concrete offers unmatched strength and longevity. It’s ideal for front entrances and high-traffic areas because it can withstand heavy loads and harsh weather conditions. Concrete can be poured into molds for a clean, uniform look or finished with textures and stains to enhance curb appeal.
Stone Steps
Stone provides a timeless, natural aesthetic that blends beautifully with gardens and outdoor landscapes. Options such as flagstone, granite, or limestone not only look elegant but also offer excellent durability. However, stone steps often require professional installation due to their weight and precise alignment needs.
Essential Tools and Supplies
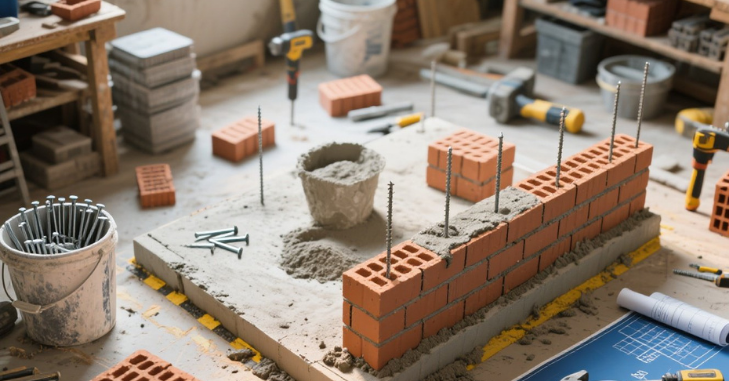
To build steps with any material, gather the right tools in advance. Common tools include:
- Measuring tape and level
- Shovel and wheelbarrow (for concrete and stone)
- Circular saw or handsaw (for wood)
- Hammer and drill
- Concrete mixer (for larger pours)
- Masonry chisel and mallet (for stone)
Additionally, ensure you have safety gear, such as gloves, goggles, and dust masks, to protect yourself during construction.
Step Design and Measurements
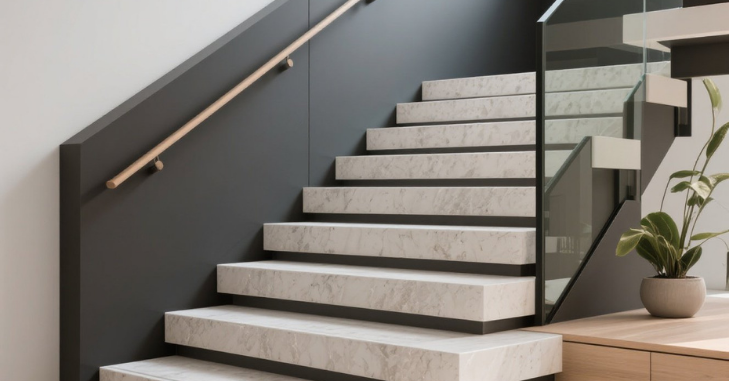
Good design ensures both comfort and safety. The general guideline for residential steps is:
- Riser height: 6 to 7.5 inches
- Tread depth: 10 to 12 inches
- Step width: Minimum 36 inches for comfortable use
The slope should be consistent across all steps to avoid tripping hazards. Sketching your design on paper before starting the build can help visualize proportions and materials.
Build Steps with Wood

- Prepare the Area – Clear the site, level the ground, and mark the area where the steps will be placed.
- Cut the Stringers – Using pressure-treated lumber, cut triangular notches to form the step pattern. Ensure all stringers are identical for stability.
- Install the Stringers – Attach them securely to the deck or landing using metal brackets or screws.
- Add Risers and Treads – Fasten riser boards vertically and tread boards horizontally across the stringers.
- Seal and Finish – Apply weatherproof stain or sealant to extend the life of the wood.
Wooden steps can be personalized with decorative railings, lighting, or paint to match your outdoor décor.
How to Build Steps with Concrete

- Excavate the Area – Dig out the foundation to create a stable base. Add gravel and compact it for drainage.
- Build the Formwork – Construct wooden molds that outline the shape and dimensions of the steps.
- Mix and Pour Concrete – Mix concrete to the right consistency and pour it into the formwork layer by layer.
- Level and Smooth – Use a trowel to even out each step and remove air bubbles.
- Cure Properly – Allow the concrete to cure slowly for maximum strength, typically over 7 days.
To enhance style, consider adding stamped patterns, exposed aggregate finishes, or colored concrete stains.
How to Build Steps with Stone
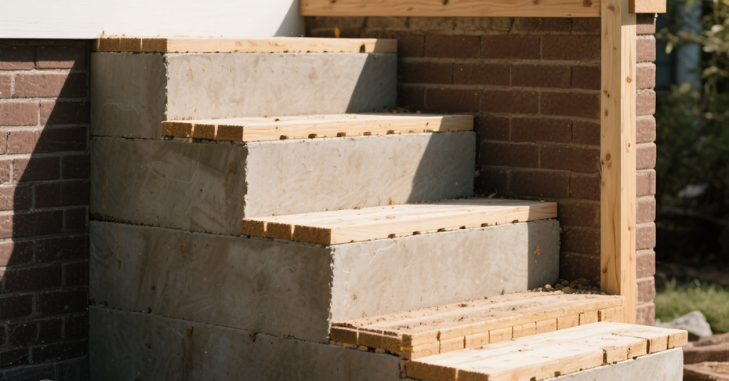
- Prepare the Base – Excavate the area and lay a compacted gravel foundation for drainage and stability.
- Lay the First Stone – Start with the largest stone at the bottom, ensuring it sits firmly and level.
- Stack Additional Stones – Place stones one layer at a time, using smaller stones or mortar to fill gaps.
- Check for Alignment – Use a level to ensure each step is even and secure.
- Secure with Mortar (Optional) – For extra stability, mortar can be applied between stones.
Stone steps offer a rustic charm that complements garden landscapes or natural pathways beautifully.
Safety Considerations for Outdoor Steps
Durability and safety should go hand in hand when building steps. Here are essential safety tips:
- Non-Slip Surfaces – Add non-slip treads, textured finishes, or anti-slip tape for enhanced traction.
- Proper Lighting – Install step lights or solar lanterns for visibility at night.
- Railings and Handrails – Required for taller steps, they provide balance and prevent accidents.
- Drainage Control – Ensure water flows away from the steps to prevent erosion or slippery surfaces.
Enhancing Style and Aesthetics
Steps can be more than just functional; they can also serve as a design feature of your home. Some styling ideas include:
- Wooden Steps – Paint in bold colors, add planters along the edges, or use decorative railing designs.
- Concrete Steps – Stain the surface in earthy tones, create geometric patterns, or polish for a sleek look.
- Stone Steps – Use a mix of stone sizes for a natural effect, or frame steps with garden plants for added charm.
Matching the steps with the home’s exterior materials creates a cohesive and inviting entrance.
Maintenance Tips for Long-Lasting Steps
- Wood – Reapply sealant or paint every 2–3 years to prevent rot and weather damage.
- Concrete – Check for cracks annually and seal them promptly to prevent water penetration.
- Stone – Keep joints filled with mortar or gravel and remove weeds that may grow between rocks.
Regular cleaning with a broom or pressure washer helps maintain both the appearance and safety of the area.
Conclusion
Building durable and stylish steps is a challenging project. Still, with the right approach, it can be both rewarding and long-lasting. Whether you opt for the natural elegance of stone, the timeless warmth of wood, or the strength of concrete, each material offers distinct benefits for various areas of your home.
By focusing on accurate measurements, safety considerations, and thoughtful finishing touches, you can create steps that not only improve accessibility but also enhance your property’s beauty and value. With regular maintenance and a touch of creativity, your steps will remain a reliable and stylish feature of your home’s outdoor space for years to come.
Want to know about “Entry Door Installation: A Professional Approach to Enhancing Home Security, Energy Efficiency, and Architectural Integrity” Check out our “Home Improvement” category.
Frequently Asked Questions (FAQs)
Wood is generally the easiest material for DIY enthusiasts because it requires basic tools, such as a saw, drill, and screws. Stone and concrete steps offer greater durability, but they demand specific tools and a higher level of skill to construct properly.
In most areas, yes. Local building codes often require permits for outdoor steps to ensure they meet safety regulations, especially if they connect to a deck, porch, or raised platform.
A compacted gravel base is ideal. It helps with proper drainage, offers firm support, and prevents the steps from moving or sinking over time.